Planning fields
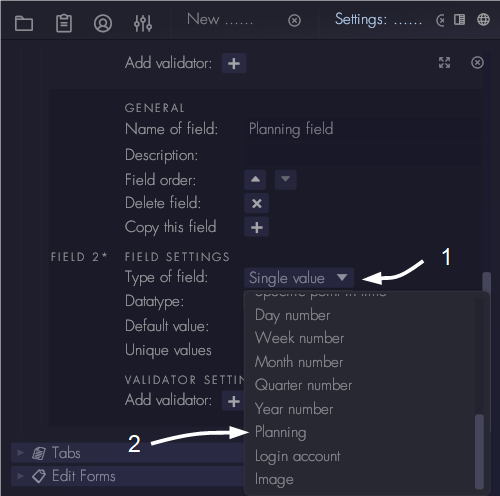
Planning fields will show a Gantt widget in the record. The user can add planning items to it and show deadlines. To add a planning field please create a new field as described here. Use a single value field type and select the 'Planning data' type:
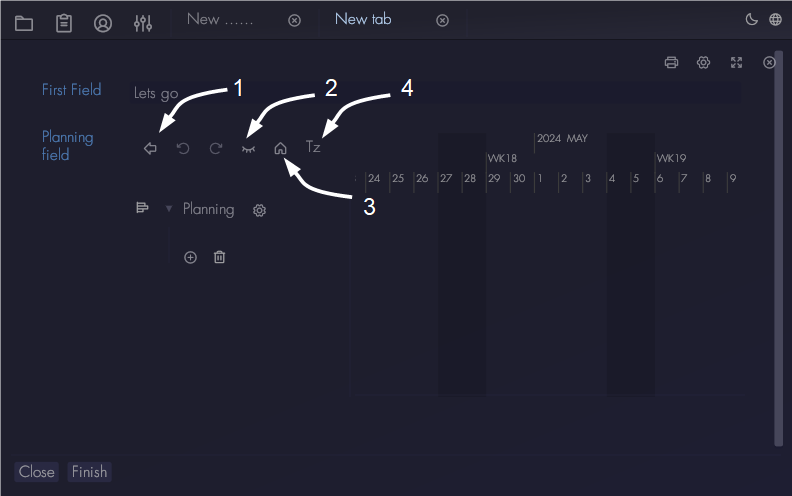
Users have some controls over how the widget looks. These controls can be found at the top left of the widget:
- Show or hide the side panel to get more space for the actual planning
- Show or hide the 'today' bar, which indicates the current time
- Return to the original view of the widget
- Change the timezone of the horizontal axis
Besides that the user can zoom and drag the planning area with mouse or touch, to highlight important sections of the planning. The time axis scales from minutes to years. To zoom the timescale with the mouse, use the scroll wheel. To zoom the vertical axis, hold the left mouse button and then use the scroll wheel. To zoom both axis, use the right mouse button and scroll wheel.
To add items to the planning use the add button at the bottom of the sidebar. Users can pick one of three objects:
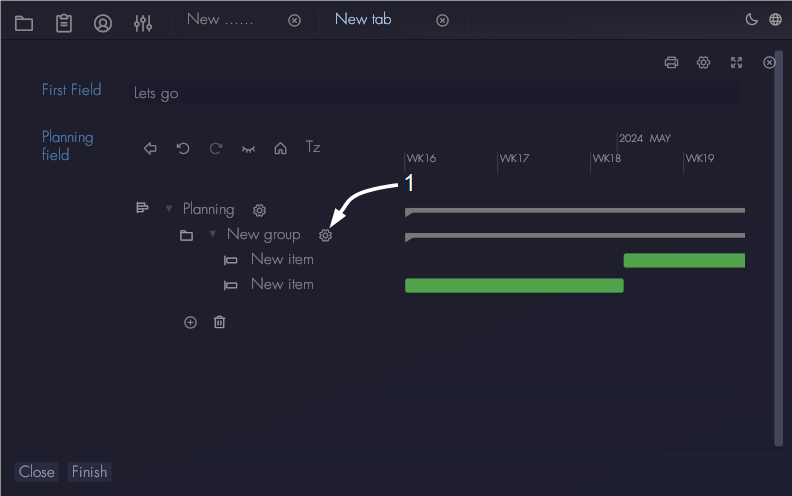
- A group: this allows grouping of planning items that are related to each other. Groups can be collapsed to keep a clear overview.
- A planning item: this is a horizontal bar in the Gantt chart.
- A milestone item: this is a either a vertical bar or a marker on the Gantt chart.

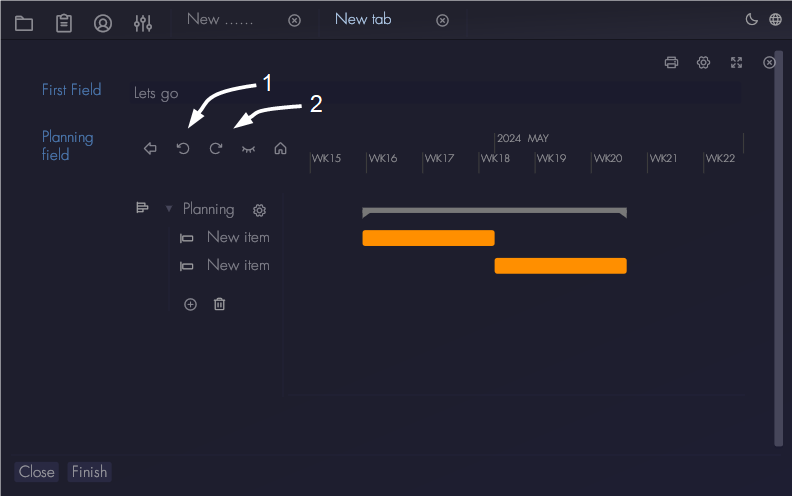
Actions can be undone or redone by using the controls at the top left of the widget:
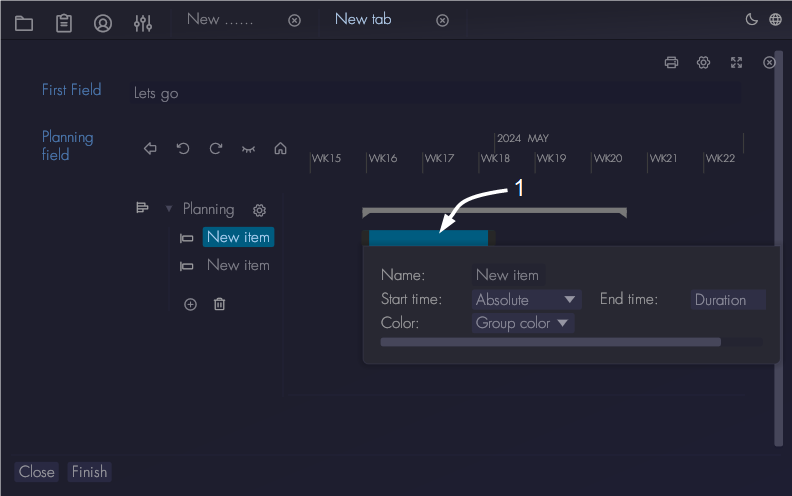
To change the settings of a planning item, click on its bar. It will show the following settings:
- Name of the planning item. This is the name that is shown in the sidebar.
- The type of start time of the item. There are two types of start times: absolute and relative. Absolute means the user sets the start time manually. Relative means that the start time depends on the end time of another planning item or group. To make a planning item dependent you can drag it onto the item on which it needs to depend. To set it back to absolute, use the start time setting shown below.
- The type of end time of the planning item. There are two types of end times: absolute or duration. Absolute means that the user manually sets the end time of the planning item. Duration means that the duration of the item is set and the absolute end time will depend on the start time of the planning item.
- Color: the bar in the Gantt chart. The user can choose to use the same color as the containing group or use a unique color.
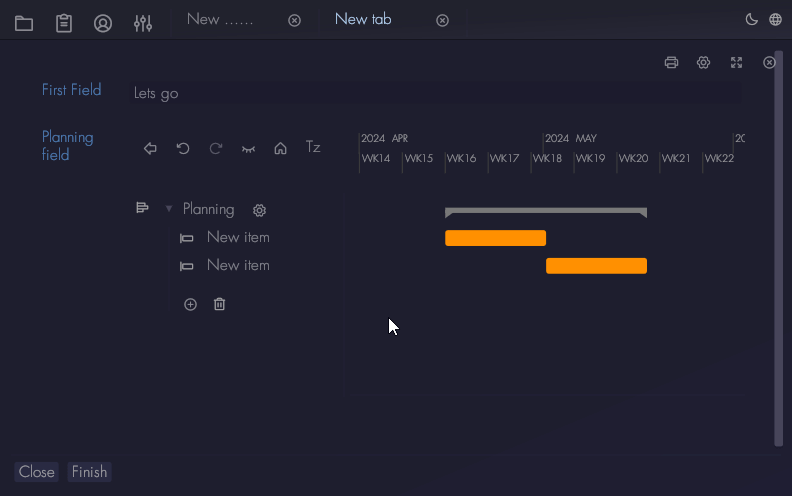
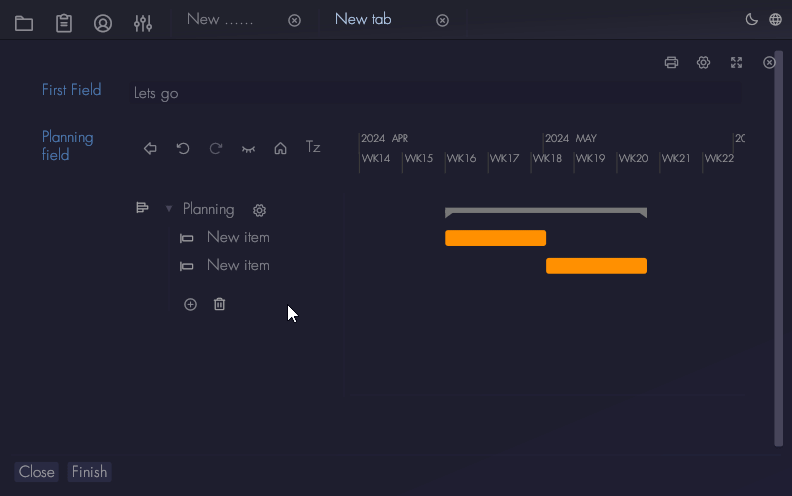
To make a planning item dependent on another item, drag it on the item on which it should depend like shown below:
To place a planning item into a group, drag it onto the group of which it needs to be a part of. You can choose the order of items either dragging it below or above another item:
To change the name and color of a group, click on its settings icon: